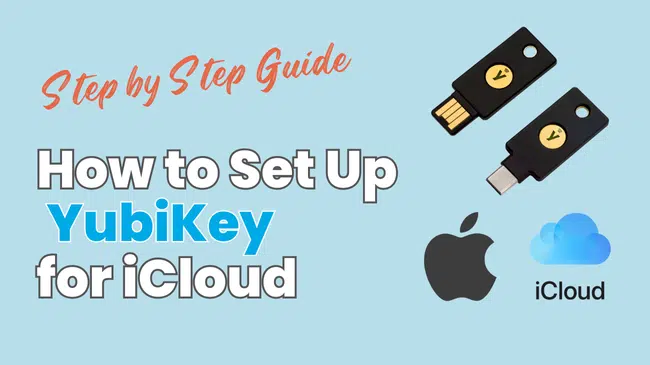
If you use an iPhone, MacBook, or other Apple devices, your Apple ID is one of the most critical accounts to protect. Adding a YubiKey as a physical security key significantly strengthens your Apple ID security, making it far more resistent to phishing attacks, account takeovers, and other forms of cybercrime.
Apple offers a number of different options to secure your account, but experts all agree that adding a physical security key is far and away the best and most secure.
Get $5 Off Yubikey!
Build the best security for your online accounts using the YubiKey from Yubico. Get an exclusive $5 off the purchase of any key here:
Note: Some of the links in this article may be affiliate links, which means that at no extra cost to you, I may be compensated if you choose to use one of the services listed. I only recommend what I personally have used, and I appreciate your support!
Why Use a YubiKey for Apple iCloud
Your Apple ID is more than just an account, it’s the gateway to your entire Apple ecosystem, including iCloud, iMessage, App Store purchases, and even device backups. If someone gains unauthorized access, they can potentially wipe your devices, spy on your messaging, access sensitive data, and even lock you out.
Apple’s built-in two-factor authentication (2FA) is a great start, but it typically relies on SMS codes or device-based prompts, which can be intercepted. Adding a YubiKey as a physical security key significantly strengthens your Apple ID security across any Apple device, making it far more resilient against phishing attacks, account takeovers, and other forms of cybercrime.
Benefits of Using a YubiKey for Apple iCloud
- Strong Physical Authentication: Prevents unauthorized logins even if your password is compromised.
- Phishing Protection: Eliminates the risk of password-based attacks.
- Easy to Use: Just plug it in or tap it, no batteries or internet required.
- Multi-Device Compatibility: Use the same key across multiple Apple devices.
These combined benefits make YubiKey an essential upgrade for anyone serious about securing their Apple iCloud account.
How YubiKey Protects Your Apple iCloud Account
A YubiKey is a small, powerful hardware device that adds an extra layer of protection to your Apple iCloud account. It acts as physical proof of identity during the login process, ensuring only you can access your account. Without the physical key, unauthorized access becomes nearly impossible.

Here’s why this matters for your Apple iCloud account:
- Phishing-Proof: Unlike SMS codes or app-based authentication, a YubiKey can’t be intercepted or tricked by fake login pages. It only works when physically connected to your device.
- Instant, Offline Security: It requires no batteries or internet connection, making it reliable in all scenarios.
- Hardware-Backed 2FA: It’s far more secure than traditional two-factor methods, protecting your photos, contacts, documents, and sensitive iCloud backups.
Once connected to your Apple ID, the YubiKey becomes a critical gatekeeper for your entire Apple ecosystem. Without this hardware key, a hacker can’t:
- Access your iCloud backups: Your photos, documents, and app data are locked behind a hardware barrier.
- Control your devices remotely: Prevents unauthorized removal or location tracking of your devices.
- Reset your Apple ID password: Blocks anyone from locking you out of your own Apple account.
In short, it’s a simple device but one that stands as a powerful frontline defense for everything stored in your Apple ecosystem.
What You’ll Need to Get Started
Before you start, make sure you have the following:
✅ Your Apple ID login credentials
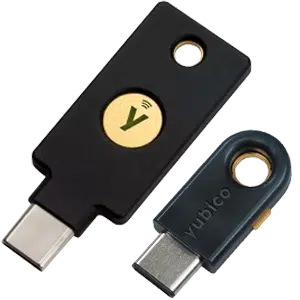
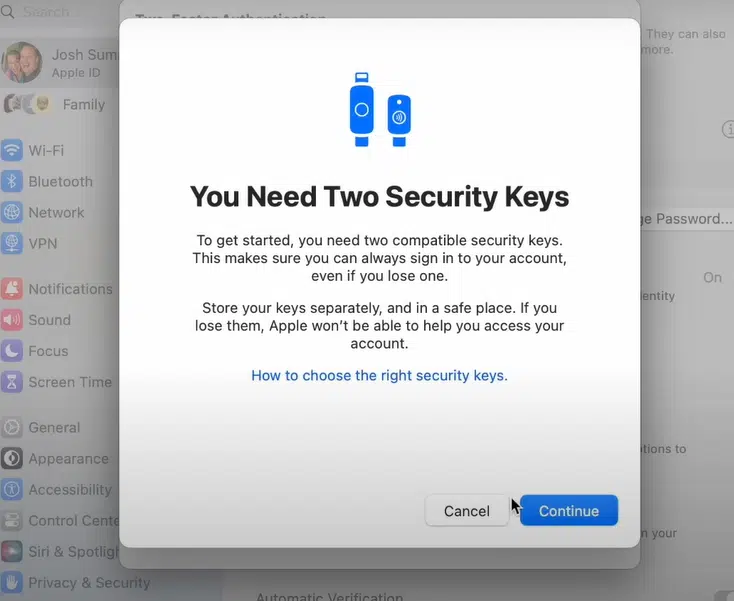
✅ Two FIDO-certified security keys (like the YubiKey 5 NFC and YubiKey 5Ci). Here is how to choose the right Yubikey.
✅ An iPhone, iPad, or Mac with the latest iOS or macOS update
Why two keys? Apple requires a primary and a backup security key for this setup, ensuring you’re not locked out if you lose one key.
Additionally, ensure you are using a modern web browser to guarantee compatibility and secure access when setting up and using YubiKey.
Step 1: Open Settings on Your iPhone or Mac
If you’re using an iPhone or a MacBook (or both), the first thing you need to do is open the Settings app. On an iPhone, tap your name at the top to access your Apple ID settings.
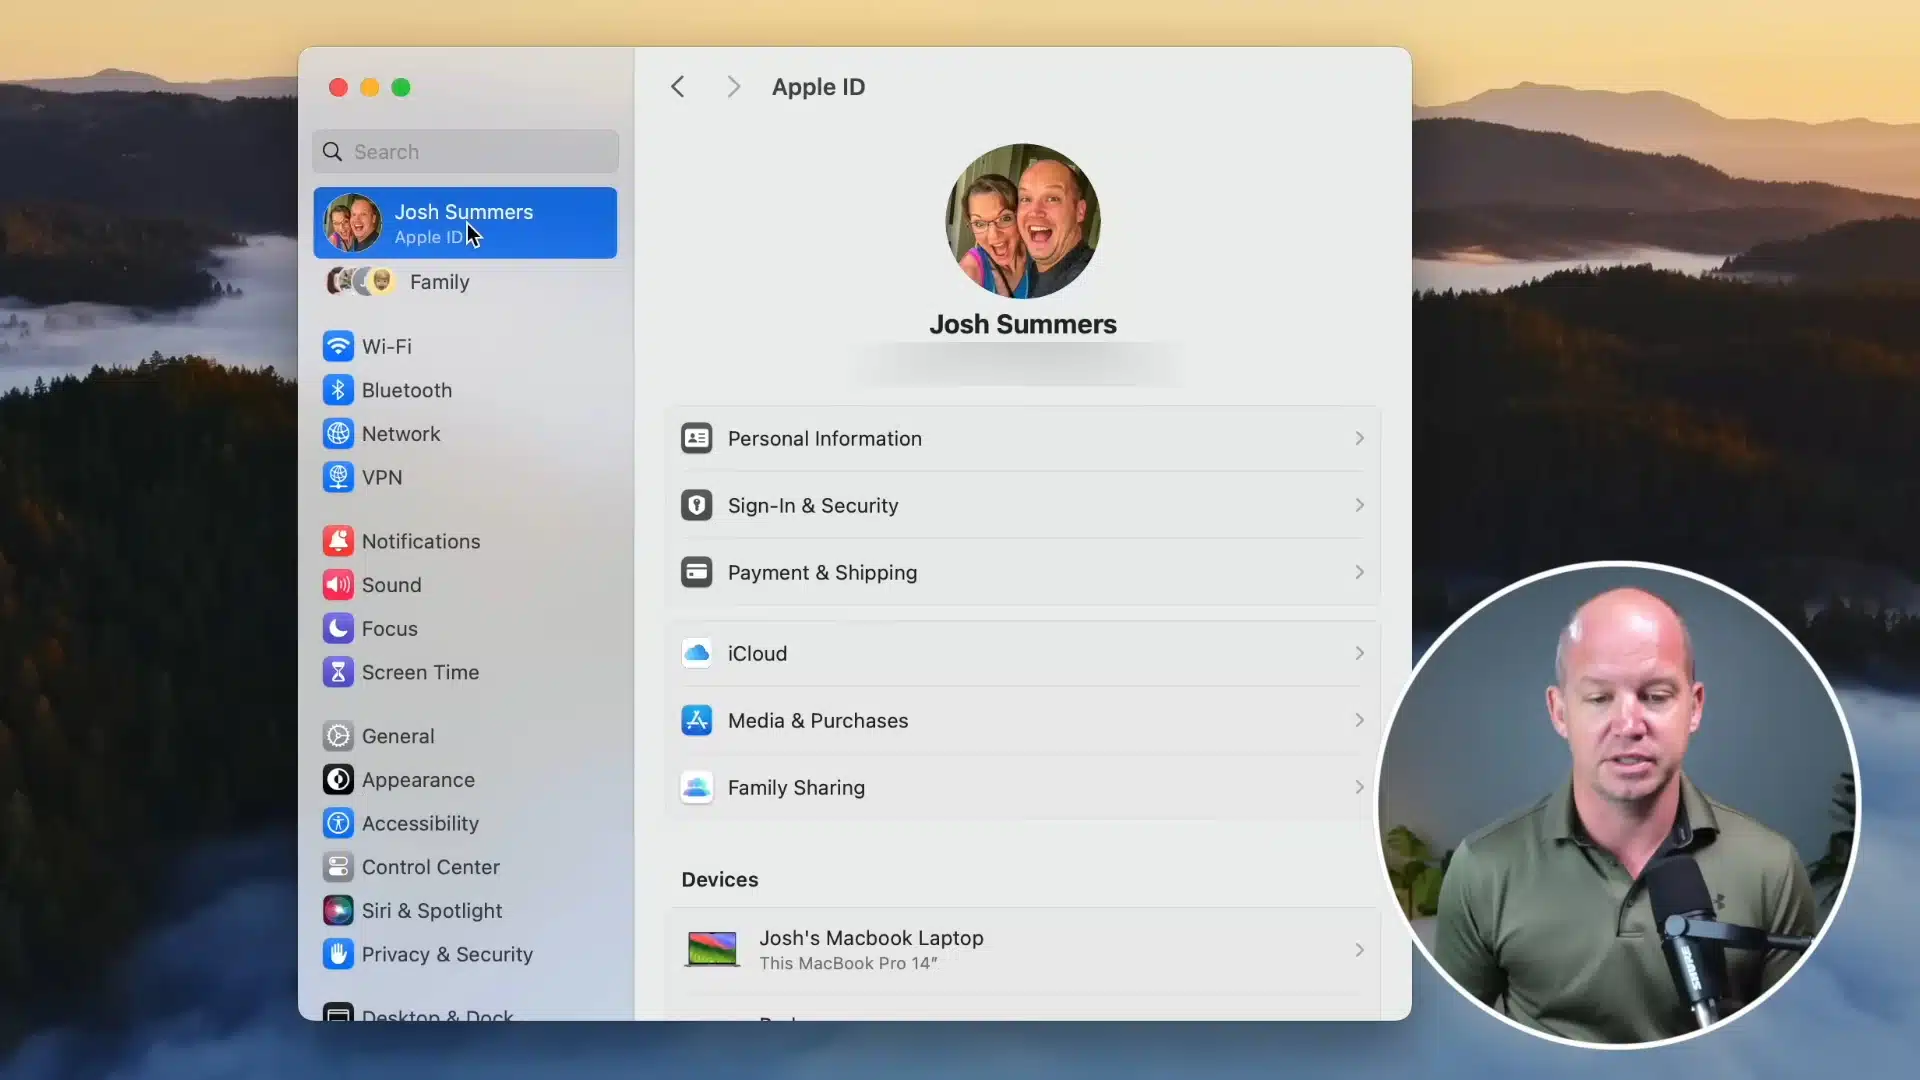
If you’re on a Mac, you’ll find this under System Settings.
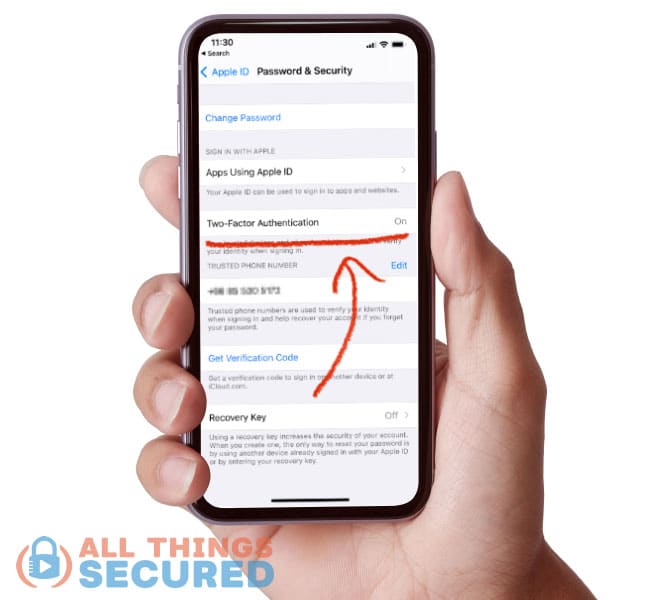
Step 2: Access Sign-In & Security
Once you’re in the Apple ID settings, you’ll see Sign-In & Security. This is where you would go if you wanted to change your password, add an account recovery method, or manage your two-factor authentication (2FA) settings.
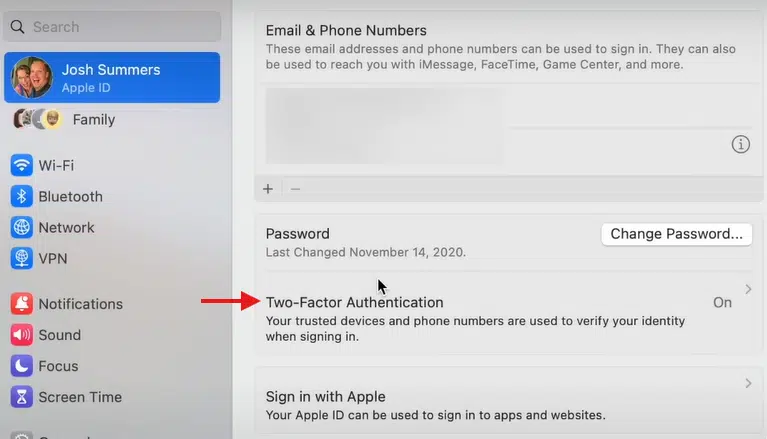
Click on Two-Factor Authentication if it’s not already enabled.
Step 3: Set Up Security Keys
Tap Security Keys and then Set Up.
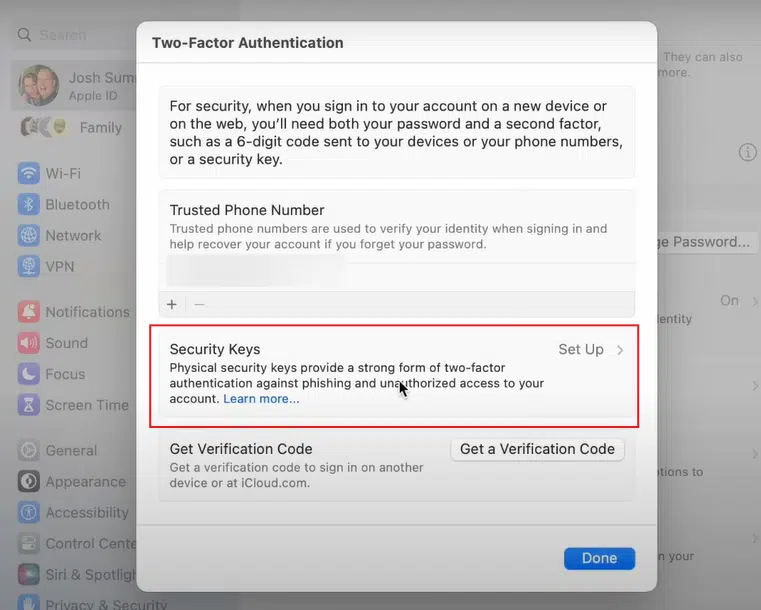
- You’ll likely need to enter your Apple ID password to proceed
- Apple will prompt you to have two security keys, a primary and a backup, ready before you can continue
- Follow the onscreen instructions to add security keys
- You may need to enter a passcode, password, or PIN to add security keys
Once this step is complete, your account is ready to accept the added protection of physical security keys.
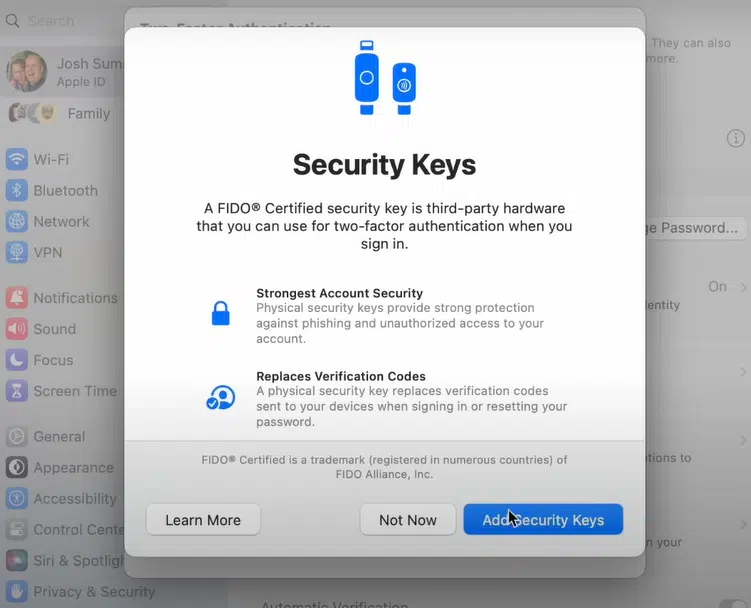
Step 4: Add Your Primary Security Key
Once you’ve entered your password, click Allow to begin adding your keys.
- Tap Add Security Keys in your device’s settings to begin the process
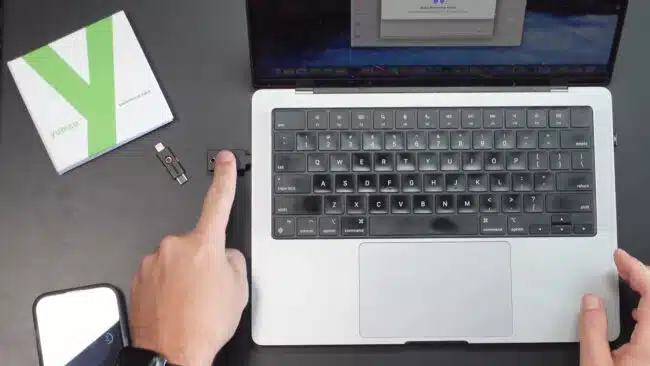
- Insert your first YubiKey (e.g., YubiKey 5 NFC) into your device or tap it against your phone if it supports NFC
- Tap the gold button on the key to activate it
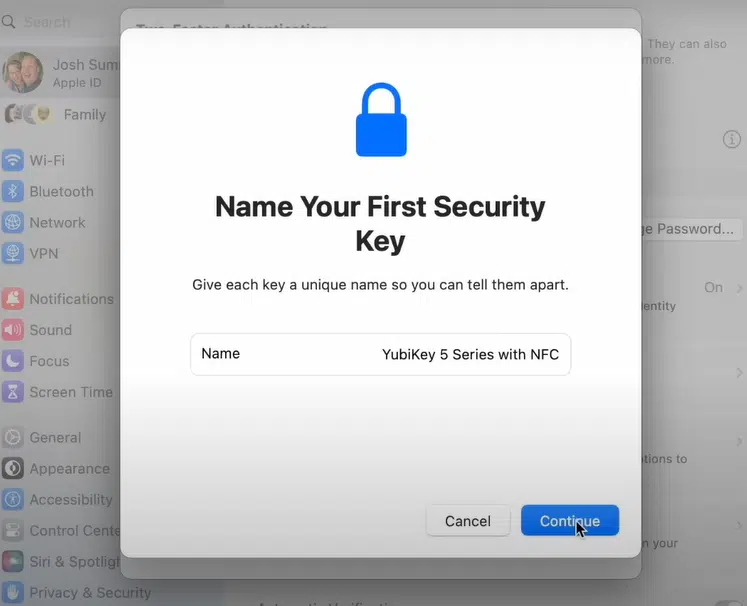
- Name your key for easy identification, like YubiKey 5 NFC
Click Continue to complete the process.
This step links your physical YubiKey to your Apple ID, making it your new frontline defense.
Step 5: Add Your Backup Security Key
- Insert your second key (e.g., YubiKey 5Ci)
- Click to activate and complete the process
- Name this key appropriately, like YubiKey 5Ci
- Click Continue
Having a backup key ensures you’re never locked out, even if your primary is lost or damaged.
Step 6: Review Your Active Devices
At this point, Apple will ask you to review your active devices. You can choose system settings to review and manage security keys and trusted devices, remove devices that you no longer use or trust, or force devices to re-authenticate with your newly added security keys.
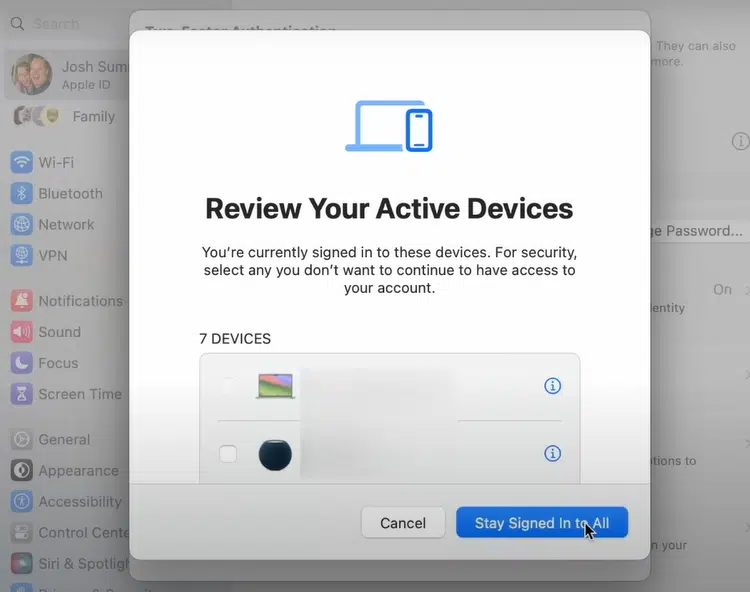
This is a good time to clean up your list of authorized devices.
Step 7: Finalize Setup and Test Your Keys
Once your keys are added:
- Click Done to exit the security settings
- Log out and back into your Apple account to confirm everything is working correctly
- Test both your primary and backup keys to ensure they function as expected
- Ensure that at least two security keys are registered to maintain access to your account even if one key is lost or compromised
💡 Pro Tip: Consider adding an extra YubiKey for emergencies, like one stored in a secure location or with a trusted family member.
Final Thoughts: Using Security Keys with Apple ID
Integrating security keys like YubiKey with your Apple ID offers numerous benefits, primarily centered around enhanced security and phishing protection.
Adding a YubiKey to your Apple ID is a powerful step toward protecting your digital life. YubiKeys deliver a seamless login experience across various services, enhancing both security and user convenience. But why stop at Apple? You can use your YubiKey to secure a wide range of other critical accounts, including adding additional security keys to further enhance protection across these accounts:
✅ Facebook: Lock down your social profiles
✅ 1Password: Add a second layer of protection to your password vault
✅ Vanguard: Secure your investments and financial data by adding a Yubikey to your Vanguard account.
For a full list of compatible services, check out Yubico’s compatibility list to see where else you can add this powerful layer of protection. You can also watch a video for additional guidance on using YubiKeys with other services.